
0:00
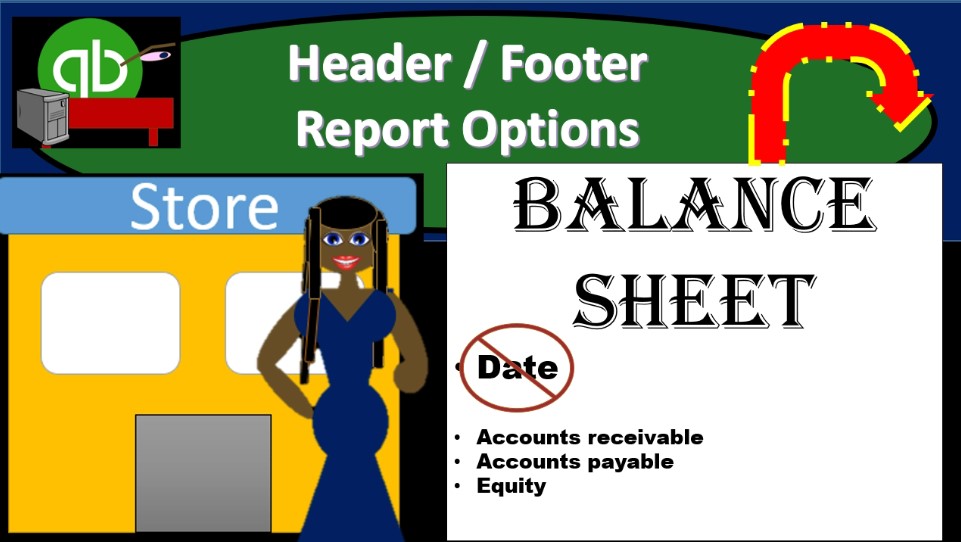
This presentation we will take a look at the header and footer options within a balance sheet reports there will be similar header and footer options in other reports as well, we will do this within QuickBooks Pro 2020, QuickBooks desktop 2020. Here we are in our gift great guitars file, we currently have the open windows open, you can open the open windows by selecting the view drop down up top and go into the open windows list.
0:25
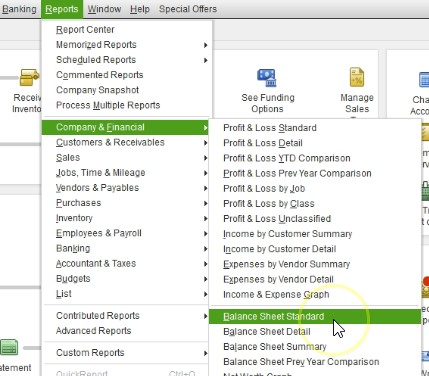
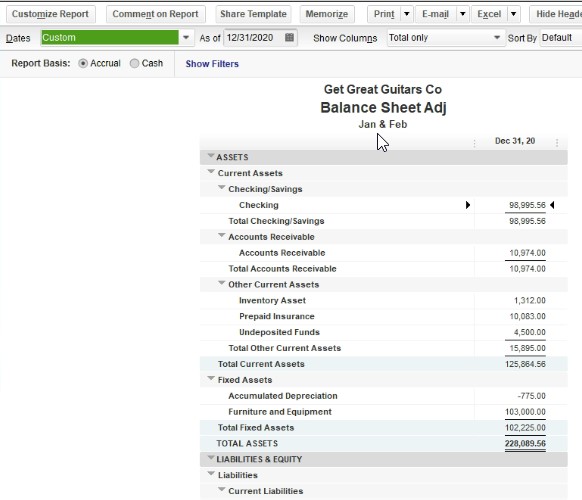
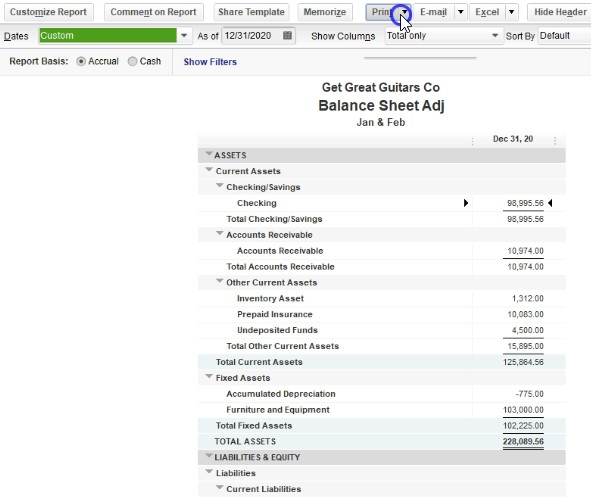
We’re going to be opening up our balance sheet the standard, we will do that by going to the reports drop down Up top going to the company and financial and then down to that balance sheet a standard report. Within the balance sheet standard report, we will be adjusting the dates, I like to do that by going to the customizing reports up top to adjust the date ranges. So I’m going to go to customized reports, we are in the display options. Now I’m going to go and change the date range from a one on one to zero to 1230 120.

0:54
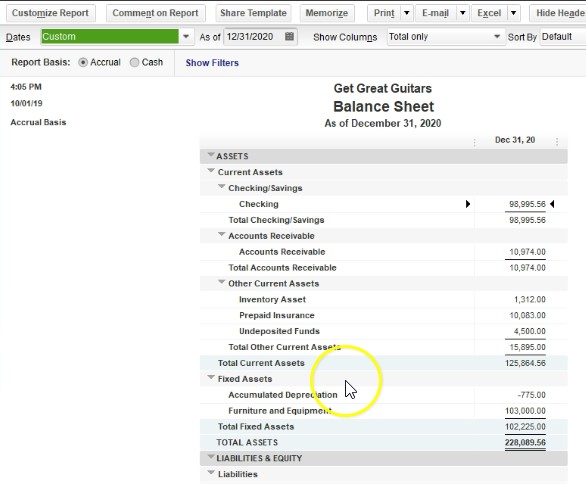
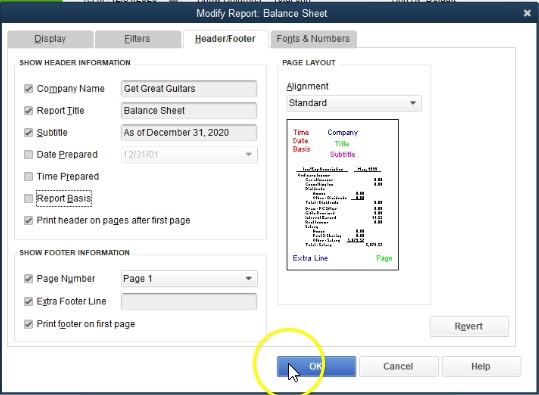
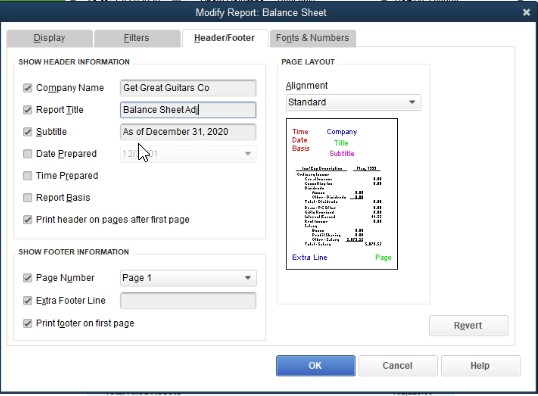
That’s January through December 2020. Then I’m going to say okay, there is our standard report for the year in 2020. Now we’re going to take a look at the header and footer options. One of the major things that we can change within the header and footer options is going to be these items here we can remove these items, we may not want these items if we’re going to print this and send it to somebody else. So what we’ll do is we’ll go to Customize reports up top, we’ll go to the header and footer. And within the header and footer, the ones that we’re concentrating in on now are going to be the date prepared, the time prepared and the reports basis.
1:33
Oftentimes, we might want to remove those we can see in the screen to the side, where we have them located as they are located. Obviously in the report to the to the left, we have the time, date and basis. So if I uncheck the time, the date and the basis, and say okay, you’ll see these will then disappear. So that’s one thing that’s going to be often useful. If you don’t want that to appear on the report that you will be printing out back to customized reports, we’re going to go to the header and footer once again, we also have the company name.
2:06
So the company name is by default, of course taken from the company name that’s been entered into the system. Usually this will be what we want to have there. However, if there is something different if it was if it was say, you can uncheck it, but it will say get great guitars there was a company after it or something like that, you can add that to the report. If you want the report title, you could debate the balance sheet is a pretty standard type of report if we’re printing the balance sheet, but perhaps you’ve made some adjustments to it.
2:37
So maybe you’ve adjusted the balance sheet in some way created some separate columns or a comparative balance sheet or some kind of adjustments to it, then you may want to adjust the title to a you know adjusted balance sheet or some other kind of name for it to indicate those adjustments that have been made to it. So this is actually a very useful column because the balance sheet is often going to be isolated point, as we will see later to creating other reports, which are no longer really a standard balance sheet, which we can then call it an adjusted balance sheet of some kind, then we have the subtitle, that’s going to give us our date.
3:14
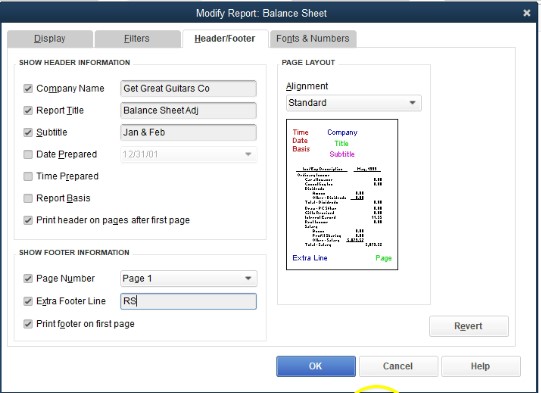
Now the standard field or the standard phrase of a balance sheet date is as of December 31 2020. However, once again and and notice what that indicates is for the balance sheet a point in time, instead of a date range, instead of a beginning and ending point, we just simply have the one date in time. Now what if once again, however, we made some changes to the balance sheet to make it so that it has multiple months in its or something like that?
3:40
Well, then of course, we would have to change the subtitle to apply the multiple months. So we’d have to say for the month ended or something like that, or multiple months. Or we might say, you know, January and February, if we’re running for the month of January in February, doing some kind of comparison between the two, then we can adjust those options. If we were to do this, just as see the change to these three fields, the change to these fields up top will take place once we select Okay, so we’ll say Okay, and now we have get great guitars company, the balance sheet adjusted, and then the adjustment down here.
4:14
Again, these are really useful because the balance sheet, the standard balance sheet is often the starting point that you’re going to want to use to customize the reports. Once you make these changes to the subtitles and the balance sheet, and to the headers, you can then memorize the report, which we’ll talk about later. So you don’t have to make those those adjustments again, then we’re going to go back into the customized reports.
4:36
We’re going to go to the headers and footers. Once again, we’ve got the print header on pages after the first page. So when we get into the second page of the report, if it’s more than one page long, the question is, do we want the header or footer to be to be displayed on the second page? Do we want to have another header or do we just want to go straight into the numbers on the second page. So that that’s really just a preference kind of thing. The default is to have this the report title on each page. But you can take that off, then we have the page number. So do we want to have the page number on there, we could have the page number in multiple formats. Or we could remove the page number altogether.
5:16
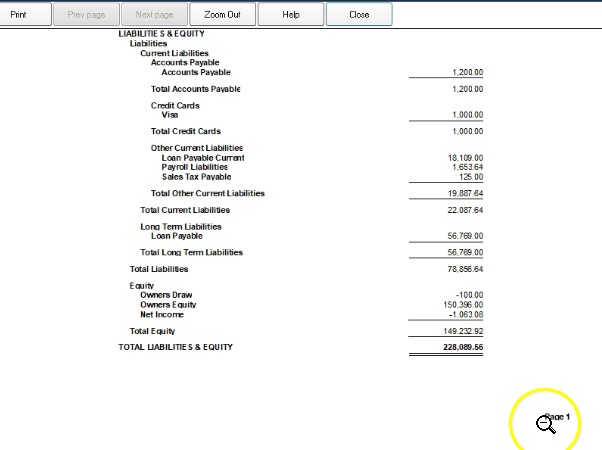
Obviously, the page number is there when we print it. So for example, if we went to Okay, then we went to print, and we went to report, and we went to preview, we want to preview the report, then here’s going to be our preview screen, looking at the preview screen. And if we go down to the bottom of it, I’m adjusting the preview screen a bit, so we can see it here. Then we’ve got our page one, page one down below. So if we don’t want the page one, and then we can remove that I’m going to close this back out.
5:50
Or we can adjust the page when I’m back into the settings, I’m going to close this, I’m going to go back to customize reports that’s in the header tab. Therefore we can change the way that page will lay out or we can remove it entirely here, then we could have an extra footer. So we might want to put something in the extra footer down below. Possibly our name of the person who made the report or you know, initials of some kind in the extra footer. Let’s see what that would look like if we say okay,
6:22
and then we go back to the printing up top, and we print the report once again previewing the printing of the report. Let’s now make it so we can see it. Once again, we’re going to preview the report looks like this in the footer displays down below down below on the page. So I’m going to close this back out. And we’ll close this back out, we’ll go back into our customized reports were in the header and footer options. So that’s going to be the extra footer. And then we had the print for footer on first page selected here.
6:55
So these are going to be the options within the header and footer options. One more thing is we’re going to have the alignment know you have the alignment to the right, and this is going to be displayed down below we can align to the left. So that’s going to be the setup over here. If we if I add back in the date, time and report basis and say okay, this is what that looks like here with those items added. If we go back into the customized reports, we go to the header and footer and we align it to the right this is what that looks like if I say okay, then it’s aligned to the right. If I go back into the customized reports header and footer, and we say that we want this centered. Then here we have it centered