This presentation and we will enter check and expense forms, we’re basically going to go through the month in kind of information or checks or expenses, we would have typical expenses such as the utility bill, the phone bill, and so on and so forth. Think about how we can enter that into the system, either as checks or Expense Type forms. If we were to actually write the check, or possibly if we had some kind of electronic transfer that would happen out of our bank account, then how would we be recording that information into QuickBooks Online? Let’s get into it with Intuit.
00:31
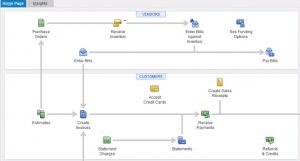
Here we are in our get great guitars file, we’re going to jump back over to the desktop version. Just to consider the flowchart as we enter these expenses. We’re going to be entering the standard kind of expenses here. And there’s a few different ways that we can do this.
00:44
So first of all, we could enter the expenses for things like the phone bill, the utility bill and so on and so forth into something like a bill, which could be useful and we’ll do this in the second month of operations will practice this procedure in the second month. We can in essence, answer the bill item here. Which will increase the accounts payable, and then the other side will typically go to an expense. And then we can actually pay the bill, which would be paying off the bill decreasing the checking account and decreasing the expense. That’s one way we can do it.
01:14
Another way we can do it is actually to write a check. So if we were to go down here and actually physically write the check for the month in information and just just simply write the check, which would be decreasing the checking account, and recording the expense, and then we can either print that check out of QuickBooks itself, which means we would need pre printed checks that we have been put into a printer and print on for pre printed checks within QuickBooks and sent them out that way.
01:38
Or we can write the checks by hand if we’re writing the check and just simply put the check into the system so we can record that data into the QuickBooks system. So we have that data as well. The other thing that may happen is we may be using some type of electronic transfer, we may be saying, Hey, take this directly out of my bank, my bank account in some way, shape or form. So we have the Electronic type of transfers that we can enter into the system which is similar to a check, but there’s not actually a check that’s being written, we have a similar transaction, which would be decreasing the checking account and recording the other side to an expense account.
02:15
So those are the things we want to keep in mind here, we’re going to be thinking about the the more of a cash basis system where we’re going to be just basically entering the expense directly into the system, rather than going through the bill accounts payable. And then in the next month, we’ll go through accounts payable when we do these month and operations so that we first have the bill and then pay it with a check.
02:38
So let’s, I’m going to minimize this we’re going to go back to our get great guitars. Now there’s a couple of ways that we can enter the checks into the system and the checks and the expenses. If we’re entering them directly into the system, then oftentimes, I’ll use the register so I’ll go to the register and enter them directly into the into the register as we do so the register will be generating the form.
02:59
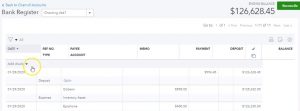
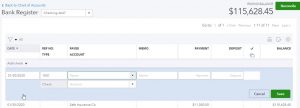
So let’s say Take a look at what that would look like it’s a little bit faster to be working in the register when possible. So I’m going to go down to the accounting down below, we’re going to be going into the register related to the checking account. So I’m going to go in the checking account up top, and you’ll see the register on the side, we want to view the register. So I’m going to view the register.
03:20
This is also what the basic kind of format you’ll see when you’re using bank feeds. So if you start to use bank feeds, you’ll typically see a screen you know, similar to this, and it’s and you want to be able to tie this out and think about All right, we’re entering this into the register, and QuickBooks will be still to kind of generating a full size form for it. But we’re just basically using the data input to enter this information into kind of a smaller screen or register type of screen.
03:44
Let’s go ahead and close the hamburger up top. And then if we scroll down and we say okay, what kind of items do we have here? We have a check we have a deposit. So that’s decrease and increase. Those are the standard two type of items. The sales receipt, the receive payment, the Bill, the refund and the expense. And then we had the transfer in the journal entries. So we have a lot of different kinds of forms that tie into, of course, the check register because the register for cash ties into just about every kind of cycle that there is in terms of the vendor cycle, and the purchasing cycle, and employee cycle and so on.
04:21
So we’re going to be then going into either an expense or a check or the two that we’re going to use here because we’re just basically recording this now if you’re if you have something that’s that’s an electronic that’s basically on the bank statement, and and it’s something that’s an automatic thing that’s going to be on the bank statement, possibly, and you take the bank statement and want to enter it into QuickBooks or you have the bank feeds that will populate for it, then you may want to use then the expense item down here for that for those so let’s take a look at that. First I’m going to go to the expense. I’m going to make the date as of the end of the month or one let’s just make it a 130.
04:58
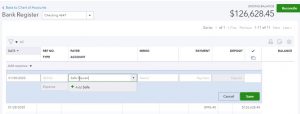
So January 30 Making 32,020, I’m not going to have a reference number. And as we enter the P ease, now we’re going to be adding new pay ease because this is the first month of operation. Now once we do this in the second month of operation, all the fees will already be there. In other words, the vendors typically that we’re going to be setting up will already be in place.
05:20
Once we set up the phone company, we fade them once the utility company, both the vendor in there will be in place, which will make it easier as well as the related account that we typically use will be there and they’ll be populate for you as you enter that data. That makes things much faster. So we’re going to say that that P here is going to be our insurance company first.
05:39
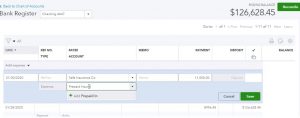
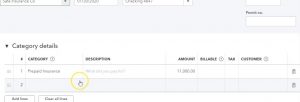
So I’m going to say it’s safe insurance company, that’s going to be their company name. So generic company name for our insurance company. I’m going to say tab, I’m not going to add any more detail. This is a vendor that we’re going to be setting up so I’m just going to say I want to add that vendor as we enter this data into the system. I’m going to put the amount here for the 11,000 11,000 now the account that we’re going to hit for the insurance is a little bit different because note that insurance is something that you pre pay you pay for before you get the coverage.
06:09
Oftentimes at your company, you get a discount if you pay for like a year or more than a year for the for the policy. So therefore, what we want to do if we could write it to insurance expense, but if we do so then when we compare like the performance, the profit loss from month one to month two, it’ll look like month one that had what we paid the insurance expense for an entire year will look a lot worse. So this is where we would probably want to apply it and it more of an accrual basis if you’re going to do that type of comparison. And and that’s what we’ll do here.
06:40
This is the standard accrual thing we’ll put it on there as a pre paid and then we’ll we’ll do at adjusting entries at the end of the month. So the simple method, the cash method here, in other words would just simply be to go to insurance expense, but it’ll distort your income statement because your month of January will look like it’s not doing so well. Because your have this big expense that was really benefiting more than just January. And then or you can do what more of an accrual method. And that’s what we’ll do here.
07:08
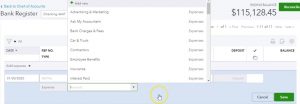
We’ll practice that accrual method. And we’ll look at the adjusting entries at the end of the time period. So what we’re looking for is prepaid insurance, what you’re going to want to do is go through the drop down and see if you see prepaid insurance. And here’s something that would relate to it from the accounts that were provided for us by QuickBooks. If you do not, then you can add the accounts.
07:29
Now you want to be careful with adding the accounts at the beginning because you don’t want to have too many accounts you’d like to, to keep the accounts down to down to basically a minimum, a minimum, a minimum, and sure, and so you don’t want to have duplicate. So when you first start to set up the accounts in the first month, just be careful that you set up the accounts that you need.
07:51
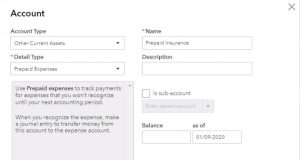
And then in the second month, more and more you shouldn’t need to set up any new accounts because you’ll just use the same accounts there and you’ll be consistent with the same accounts that you set up In the first month as you first start a transaction with any new vendor, so I’m going to say tab. And then it’s going to ask us to set it up. Now it’s important to get the account type, right?
08:10
Most of the time, if it’s going to be an expense, the account type is going to be an expense, it’s going to be an expense type of account, but this time, little different, we’re going to put it into prepaid because this is this is something we paid for, that’s going to be benefiting multiple periods into the future. So we’re looking for a prepaid item. And that’s going to go into other current assets.
08:30
So we’re going to say other current assets. And then in the detail, we want to have the prepaid expenses. Now, I wouldn’t put the prepaid expenses over here because I’d like to list out what type of prepaid expense we have. The account type is going to be prepaid insurance that’s more specific on the type of prepaid. Again, you don’t want to use any beginning balances after you first set up the account. So I’m not gonna do anything to the beginning balances down here. We’re gonna say Save and Close then.
08:56
So there we have that one. I’m gonna record it now. What’s this? gonna do it It’s going to be decreasing the checking account and the other side is going to be going to the prepaid account, which is an asset. Let’s go ahead and see that all right click on the tab up top, and duplicate the tab up top.
09:15
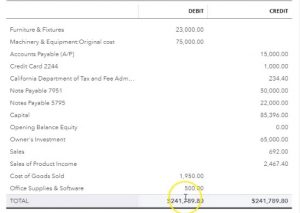
And then I’ll go back to the left, and then I’m going to save this one, we’re going to save it, I’m going to go back to the tab to the right. And let’s take a look at our trial balance. I’m going to be working with the trial balance here because it’s a little bit faster than maybe we’ll review it again with the balance sheet and income statement after we’ve entered all the expenses, so I’m going to go down to the accounting.
09:38
We’re going to be taking a look at the TB I’m sorry Banta reports, then we’re going to be taking a look at the TV or the trial balance. So I’m going to type up top trial balance because they put the trial balance with the bottom one scroll all the way down there. So we’re going to open up the trial balance and then we’re going to change the dates from Oh 10120 to 1231. to zero, then we’re going to run that report, close the burger, a hamburger.
10:06
And then if we see the checking account, selecting the checking account, then scrolling down, we see our check here. So the check is decreasing. There, we have that notice it’s using an expense type form. So in other words, if I was to click on the form, it’s an expense type form, which is kind of like a check form. But you know, similar format, except it’s not a check, you know, some other type of transfer that went in possibly an auto transfer.
10:33
That was that doesn’t have a check numbers, and there it is, but it looks like a check form. Don’t let the expense form throw you off to the fact that there’s no expense related here in here, because it’s a prepaid insurance, which is an asset account. So the expense forms a little deceiving in that case, because you would think there would be an expensive involved in the transaction and there’s not. So just be aware of that. It’s just a form that’s being used as what they call it instead of a check when there’s not a check, but it’s still like an electronic transfer type thing.
10:59
So then it We then go down to the other side, it’s going to be prepaid insurance. Notice it’s up here in the assets as well, because it’s fairly large. And then we’ll we will do adjusting entries to it at the end. So there is that once again called an expense, even though it’s in prepaid assets, back to the trial balance, back to the register on the left hand side. Next, we’re going to put an office supply. So I’m going to put it in on the same date here. We’re going to say office supplies. This time, however, let’s say well, what if we did write a check?
11:28
Now I’m going to imagine I’m going to imagine here that we’re not going to be printing the checks from QuickBooks right now. But what if we wrote a check by hand out of our business checking account, you know, we wrote the business checking account check. Now we want to enter that check into the system. Either we see it on the bank statement, or we should it would be best if we’re writing the check, and we actually enter it into the system as we write the check, right? Even if it’s not being printed from the QuickBooks system. So okay, so now we’re going to say I rewrote a check, so it’s on January 30. We’re gonna say the check number is 100. One.
12:00
Now this is the only time you should have to put a check number into the system, that would be the first check in our in our checkbook. And then QuickBooks will generate each new check with a same number, and it should tie out to the check number you have in your checkbook. That’s going to be an internal control and important one. So you probably want to want to keep that in place, we’re going to say this is going to be going to staples. So it’s going to be going to staples, which is like an office supply store. That’s going to be a vendor, all I need is the name. I don’t need more detail than that.
12:26
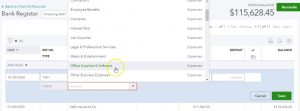
So I’m going to say save that, then we could put a memo and by the way, memos are good anytime you’re going to put a memo but I’m not going to be putting a memo here. And then the payment that we’re going to have is going to be 500 500. And the other side we’re going to say is going to be office supplies so staples whenever we go to staples, we’re going to say office supplies.
12:46
Now note, if I purchase something large at Staples, then like 500 even might be something I need to capitalize meaning depreciate it put it on the books as an asset and the depreciated. If I buy multiple things at Staples, then you They want to try to differentiate kind of things you buy like in the name, because then it’ll tie out to the, the account. So you want to differentiate so that you don’t have to basically switch back and forth using the same vendor, which has different accounts down here that you’re purchasing things from.
13:17
So if you could somehow differentiate the vendor name up top in the account, then every time you populate it, you can the account will populate in the future for you, you want to make it as automatic as possible for future data input. So we’re looking for office supplies and some type of office supplies or something like that you would think QuickBooks would give you because that’s kind of a normal type of thing.
13:39
So if I scroll through it through here, I’m going to say office supplies. Now when you first start with QuickBooks, this is basically what you want to do. You want to say, Hey, I’m going to make every time I have a new account. I’m going to look through QuickBooks, if it’s an expense account, I’m not going to assume QuickBooks has it.
13:54
has some format of it. I’m going to go in there and find it in QuickBooks and use that account if they don’t have it. Then I’ll make up my own account. So don’t default to just making up your own account because then you’ll have a whole lot of accounts. And if you don’t like the name QuickBooks has like if you don’t like office supplies and software, and you just want office supplies or something like that, then possibly use this account, then go to the chart of accounts, and simply change the name or edit the name. That way you keep your chart of accounts somewhat trim down.
14:23
Once you’ve gone through the chart of accounts a few times, then you can go back into QuickBooks Chart of Accounts and look at all the ones you’re not using. And possibly just delete them or deactivate them. So that you keep things as simple as clean as as possible to a few accounts as possible that do the job to give you the information you need is what you’re looking for. So we’re going to then say Save and Close.
14:44
And what’s going to happen here if we go back to our trial balance, then let’s see what happens obviously, if we go to the check, let’s go to the checking account up top and center. And I would think another check happened here. Now we actually have a check number which is dice was the top of the screen doing that certain degree We got the 1001 check number and then there’s the 500 going out. So and then we can go back up top and say, okay, the other side should be going to an expense which we made a new expense down here.
15:13
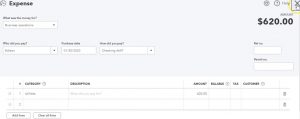
It’s not new account, but first time we used it. And there’s the 500 on the expense side, which would be increasing the expense, decreasing the net income. All right, then let’s go back to the left side of the screen, and we’re going to go and say we have another one. And this time, I’m going to say this is Edison, which is our electric company. And then those we just do an electronic transfer we’re going to say so it comes right out of our bank account. And so we saw the bank statement, we see that it’s now been decreased.
15:39
We need to enter it into QuickBooks or possibly we have the the connection to the bank account with the bank feeds and now we need to be a similar process there. So I’m going to use in an expense type of form because I don’t need a check number. So I’m going to use an expense type form. And then we’re going to say that they pay he is going to be Edison for time we paid Edison. So we’re going to type it in there and add it. That’s our, again, our utility company electric.
16:07
So I’m going to say save their memo, I’m not going to put a memo and note that in the memo, you could put like, you know, the the period that the bill was covered, or the bill number or something like that would be useful. So in any added information that can tie things out is useful there. And so we’re not going to do it in the practice problem. So it’s going to be for 620, we’re going to say, and then we have to pick the account on the drop down again, I’m going to assume that QuickBooks has set up some type of account already, if it was the second month of operation, the account would populate automatically for us.
16:43
Now, note that if you if you deal with something like Edison, the the electric motor, it’s kind of common practice to put it into utilities like electric and gas. And so you may just use electric and gas put that in the utilities. But notice that’s just a convention. If for example, you think electric bill is high and you want to track your electric bill, then you may want to have a separate account called electric expense versus the gas expense. Right. So the the phone bill used to be under utilities as well now no longer is because it’s significant.
17:14
So it’s really a question of how much grouping Do you want to have under under the group’s I’m going to use the norm, which is YouTube utilities and see if they have an account for that which they do. But just recognize again, that’s just a convention, there’s no like law that you have to have the electric under the utilities. If you think the electric is significant. You don’t need to be combining it with the gas, you could break it out and track it on its own. Let’s go ahead and save that. And then we’ll go on back to the trusty trial balance over here and see what happens if we scroll back up top, we should see another item that would be decreasing down here for the Edison. So there that is there’s the utility, the other side’s going to go to utilities.
17:56
So I’m going to scroll back up top say the utility Then should be affected. So we should have another account, there’s the utilities account there. If we go back into it, we’re using an expense type form. If you open up the Expense Type form, then you see the detail in it. Notice if you paid the utility and you wanted to build your client for it as we did kind of with one of our billable items, then you typically need to go to the full form rather than the register will, you’ll have the billable option here to then go through and tag this and then create a invoice with it with that billable item.
18:32
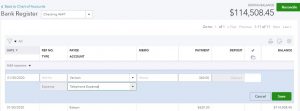
So I’m going to close this back out, then we’ll close this one back out and we’ll go back to the trial balance back to the trustee TB can go back to the first tab where our register is, next one’s going to be for rising. So I’m going to keep that as an expense. It’s already on the Expense Type form up top in our register. So I’m going to keep that I’m going to say this is on 130 as well. And we’ll tab through this and for reasons our phone company.
18:55
So I’m going to say Verizon v our eyes and I think that’s a spill. Horizon, and then tab, we’re going to add the phone company going to say, add that save that. Now, again, I’m imagining here as we do this data input, that this information is on the bank statement, it’s electronic transfer. And we’re basically looking at the bank statement, say, Okay, what have our expenses been, or taking a look at our bank account online or having the feeds to tell us what our expenses have been, because it’s going to be an electronic type of transfer, or else we call it in possibly with the phone and said, Hey, you know, take this out of our bank account.
19:30
And so now we’re going to record it as an expense type form in here. Again, the memo would be good if you can, if you can reference to the bill or the or the period covered, not going to do it here, however, then we’ll have the payment. So I’m going to make the amount this one for 360. So we’re going to say 360. And then we’re going to choose the other account.
19:50
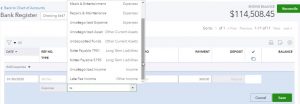
This is our telephone company. So once again, I would expect that QuickBooks would have something called telephone expense or something like that, because that’s typical. You could group it under utilities with you Used to be like a long time ago kind of a convention. Now it’s not because it’s significant.
20:04
Most people will of course, break out the telephone expense. And notice you could even have I mean, some companies may have multiple, you know, telephone expenses that they want to that they want to break out as well, they could have telephone expenses by different regions. And you might want more detail in terms of the telephone expense depending on the industry. I’m kind of shocked that QuickBooks didn’t give us a telephone default account here. I’ve tried to type it in and I’ve gone through here to see one and I don’t see a telephone expense. So it’s kind of unusual. I would think that’s a little unusual, but it is what it is.
20:35
So I’m going to actually add the telephone expense because I would rather have telephone broken out separately rather than add it into utilities. So I’m going to say, so phone, and you could put expense, it’s probably probably repetitive, but I’m going to put telephone expense as the account name. Why is it repetitive because it’s also typically the account type. So if I select the account type, it’s going to be an expense account. So it’s a telephone expense expense. account type.
21:01
So and then the sub account, I’m going to say the sub account is going to be something like their utilities or put it into utilities. And then it’s going to be the name, however, will be the telephone expense. So then I’ll say Save and Close.
21:16
Note however, note that this is also an area where you might want to use those sub accounts, you could say, hey, if I want to break out different telephone by region, then you can have a parent account for telephone and then the regional accounts that you have two different bills that possibly or if you want to say I want an overall utility line item, then breaking out the telephone utility and get your telephone Gas and Electric under that. That’s another way that you can format this that would simplify your income statement if when you want to by minimizing those accounts to not show the sub accounts, or to show the detail for it with those sub accounts.
21:51
So I’m then going to say save. Let’s go with into our trial balance on the right see what happened there if you go to our checking account up top scroll on down, we should have a telephone expense, then down here for Verizon. So there’s Verizon 360. Going back up top, going back to our reports. Scrolling down, we should then have telephone expense, there it is at the 360.
22:17
Now let’s take a quick look at what this would look like on the financial statements. So if I right click up top, and I duplicate this form, we’re going to open up our balance sheet and our income statement. So then I’m going to go to the, to the reports to the left, and I’m going to go to the reports. Let’s go into the reports. And we want to take a look at our favorite reports. That being the balance sheet report first, and we’ll open that up. We’ll change the dates up top, so I’m going to change the dates from one or one to zero to 1231 to zero, then I’m going to run that report.
22:54
Then I’m going to duplicate that the tab again will open up our income statement or Profit and Loss report. So I’m going to Duplicate the tab again, go back to the reports on the left, back to the reports. And we’ll take a look at our profit and loss report. So we’re going to open up our p&l profit loss income statement report, changing the dates up top from a one on one to zero to 1230 120. Then we’ll go ahead and run that report.
23:21
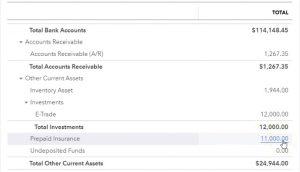
All right, let’s go back to the balance sheet and take a look at it. First, I’m going to close the hamburger I’m going to make this a little larger holding down control and scrolling up. Now we know that of course the checking account is up top. So we saw that on the trial balance that’s going to be under the asset accounts. The other account that’s on the balance sheet that has been affected was that asset account that’s going to be down here in the other current assets.
23:42
The prepaid insurance, we put it in the in the books as an asset once again, because we didn’t expense it in the current time period. We’re going to consume it over the next year and therefore it should be capitalized, although if you want to expense it in the first month on a cash basis, you can’t do so it’ll just kind of throw off the comparison from month to month, you just have to consider that or take that into consideration when you’re comparing January to February, for example, on the income statement, for example, if we then go to the income statement, and then close the hamburger on the left, if we had that 11,000 on the income statement, you’ll see that we currently have a loss of 270,000.
24:20
If we put the full 11,000 here, then we’d have our loss for January would be more extreme. Given given that a mountain it wouldn’t really be fair to January to give it the full loss because even though we paid it in January, it’s going to be benefiting February, March, April, all the way through December. So from a from a competitive standpoint, on our usage, how we how much expense we used, it would be more fair to put that on the books as an asset. And we will be putting part of it over here when we do our adjusting entry.
24:48
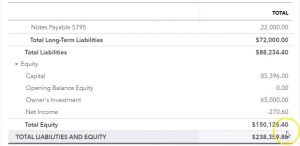
So we’ll do that at the at the end in the adjusting entry process. We now have our sales up top that we’ve been entering in the process. We’ve got our cost of goods sold, and here’s our new items that we now have. We have the supplies office supplies expense, the telephone, the utilities, the those expenses add up to the 1004 80. That means the net income is currently at a loss of the 270. That 270 if we go back to the balance sheet is going to be reflected in the equity section scrolling down, there’s going to be the 270.
25:19
So as you work with these three reports, note that it’s very nice and quick, if I go to the trial bounced to see all the accounts here in one section, so I can see all the accounts there. If I then want to know what net income is, then it’s nice to jump over to the profit and loss statement to get the calculation of net income. And if I want to know the more detail of the breakout of the accounts that the subcategories, then I can also use the the profit and loss and the balance sheet reports in order to see that the subtotals and so on, related to them.

