
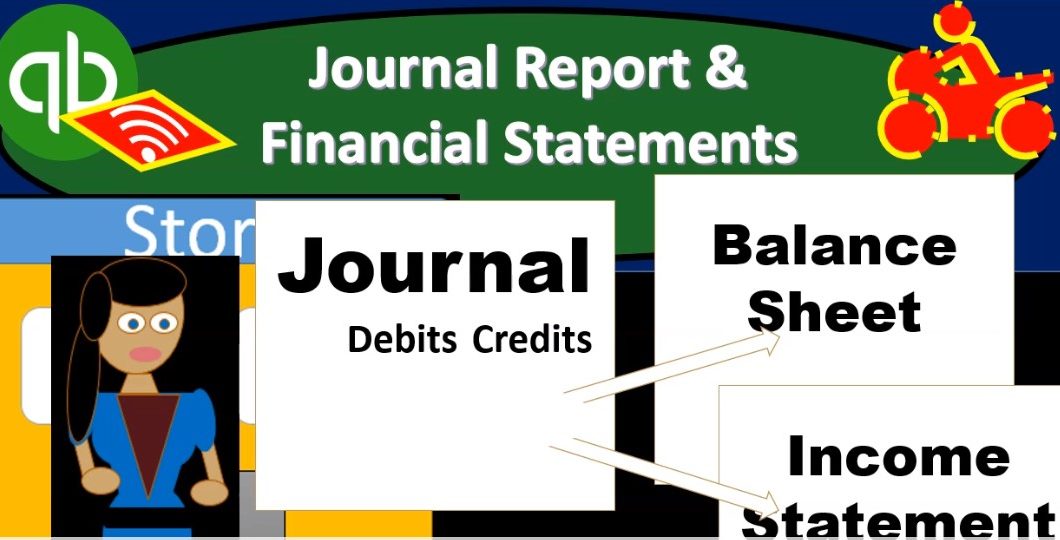
This presentation and we’re going to take a look at our reports our financial statement reports and journal entry reports. After we have entered the adjusting entries, we’ll take a look at the familiar balance sheet and income statement. We’ll also take a look at a journal entry report. That’s going to be a very useful report when we enter adjusting journal entries because it will reflect those adjusting journal entries. Let’s get into it with Intuit QuickBooks Online.
00:24
Here we are in our get great guitars file, we’re first going to take a look at our reports. So we’re going to go down to the reports on the bottom left hand side opening up our favorite reports after having entered the adjusting journal entries that includes the balance sheet. So we’ll open up the balance sheet, we’re going to scroll back up top, we’re going to change the dates from Oh 101202 hours make it oh to 29 to zero. Then we’re going to go ahead and run that report.
00:50
We have the report for the two month time period, we’re going to right click on the tab up top duplicate it. Then we’re going to go to our second favorite report that of course being the P and L Profit and Loss Income Statement, we’re going to be opening up the P and L, then we’ll change the dates up top on it for that two month time period, once again, that being from a 101200 to 29 to zero, then we’re going to go ahead and run that report, then I’m going to duplicate it right clicking on the tab up top and duplicate that report. So let’s just first consider these two these two reports is going to be our standard kind of process. We’re going to look at these two reports. I’m going to close up the hamburger. And these are going to be the reports after having entered the adjusting entry.

01:37
So for the practice problem would you want just basically review these reports, you can take a look at them and compare and contrast them from before the adjusting journal entries just to get an idea of what the adjusting journal entries have done. So here are our numbers here. If you don’t tie into anything here then of course you can zoom in on it, consider the date range problems, and then look at the transaction detailed report. Remember the transaction detail report that we looked at at the end of the last section, end of month two. And if you were okay at that point, and you’re still have a number that is off at this point, then we’re going to take a look at the journal entry report, which are those adjusting journal entries.
02:16
So I’m going to go ahead and print this one out. So let’s do our standard formatting with it. And we’re going to save this practice saving it to our standard thing. So we’re going to then go up top, let’s customize it. And I’m going to remove the sense I’m going to make it bracketed, I’m going to make it red, I’m going to scroll down to the bottom, we’re going to have the header and footer and remove date time and report basis, then we’ll run that report. Then I’m going to print that report. So I’m going to go to the printing up top and print it I’m going to be printing it to the cute PDF printer of magining. We’re going to be giving this report to somebody I want to have an attachment that I can kind of put multiple attachments on one email Or then zip the email.
03:03
So it’s asking us where do we want to put it, selecting the drop down and I put it into section 10 is the one we’re on here. And I’m just going to call this the balance sheet, it was called the balance sheet. And there we have that I’m going to save that one, and close that up. We’ll do the same for the profit and loss. Now remember the profit and loss, you can record it for January and February. Or you could do that kind of comparison. We didn’t do adjusting entries as at the end of January, though, so we because we’re saying the financial statements, we only needed them we’re going to say at the end of February, so we did adjusting entries as of the end of February here, so everything looks good as of that point in time.
03:44
So here are our numbers here. Again, if anything doesn’t tie out, use the zoom feature to take a look at the more detail with it. And then consider a date problem and then we’ll take a look at and then take a look at the transaction detail report but if you are okay by the end of the last section, and you’re all At the end of this section, then it’s probably due to the journal entries. And we’ll look at that report shortly. So let’s go ahead and print this one out. So I’m going to go up top and go to the I’m sorry, I’m going to customize it first, let’s do some customization. We will customize first I’m going to remove the pennies, put brackets around it, going to make the make it red for the negative numbers, and then I’m going to remove the date time and report basis, then we’ll run that report, then we’ll print that report.
04:30
So I’m going to go to the print item will print it out. And we’re going to print it to that cute PDF printer once again so that it’s actually going to print like make a PDF file as we have seen, and we will open that up. It’s going to be the income statements. I’m going to call it the income state meant and there is that so I’m going to save that one will also export them to our Excel sheets. I’m going to go back to the first tab. Let’s do our exporting thing there as well. Let’s export it to excel, open up the Excel report. So there we have it. I’m going to save this to our to our folder. So I’m going to go to the File tab, we’re going to save as we’re going to browse to see where we want to put it.
05:19
I’m going to put it under the adjusting entries labeled 10. And I’m going to call this financial statements finance your state ments and that’s going to include this item, the balance sheet and the other reports that we will include to it, including the P and L profit and loss. So let’s pick that one up. Now, we’re going to go ahead and export that to excel. So we’ll go to the export item, open up the Excel worksheet. There it is. Now we’re going to copy the whole sheet so I’m going to select this little triangle at the top and then right click and copy the entire sheet that I’m going to minimize this tab we’re going to open up a new tab at the bottom of our other worksheet.
05:57
Double click on the name to add it I’m going to call this P and L, P and L for profit and loss, we’re going to go up into a one the first sale and we’re going to paste that entire thing. So there we have that one. I’ll save that. Going to minimize this. I’m also going to open the the trial balance. So we have a look at the trial balance. That’s another good review report. So I’m going to go down and go to the reports down below. hold down Control, we’re going to be looking at our trial balance I’m going to go into the find feature and look at the trial balance the trial balance and we’ll change the dates up top once again from Oh 101202 to 29 to zero not to one but two zero, run Matt report going to minimize or close up the hamburger hold down Control, bring it back up to the one to five.

06:46
So this probably the best reports be comparing your numbers to so here are these numbers. If anything is often you work on as of the end of the last section, then it’s probably the journal entries which we will take a look at shortly. Let’s go ahead and format this and Print it out. So I’m going to go back up top to the customization, we’re going to be removing the pennies, we’re going to select the negative numbers to be bracketed and read. Then I’m going to go down to the header and footer, remove the date, time and record paces, then I’m going to go ahead and run this report. And then we’ll print it and export it. So I’m going to select the drop down, actually, I’m going to select the printer first was printed first. That’s what we normally do. Let’s keep it standard here, keep the standardization will print this one to the cute PDF printer.
07:33
We’re going to select the print button once done with that. And then it’s going to ask us where do we want to put it? I’m going to say that it’s going right in the right place. There’s it’s more like it’s saying I’m putting it right there. Is that right? And we’re gonna say yeah, that’s right trial balance. So there’s the trial balance, and we’ll save that one. Let’s export it to excel now. So selecting the drop down up top and then export it to excel as well. opening it up in the bottom left within Google Chrome. There it is. Let’s copy it over now. So I’m going to select the top item, the arrow, right click and copy the entire sheet.
08:10
Then I’m going to minimize it, I’m going to go to the other sheet where we have the balance sheet and the p&l. And I’m going to be opening up the plus button at the bottom to open up a new tab for it. going to double click on the tab name. And this is going to be called the trial balance. I don’t know why I have to capitals that I’m going to keep it there for now. So we’ll just keep pushing forward on a one. I’m going to right click on a one. And we’re going to be pasting there. Let’s see if this fits on a page because that one the stupid California Department of so on, so forth is awfully long. So I’m going to go to the Page Layout view it still fits on a page. So we’re okay there. That’s okay. That one we probably should just be calling sales tax payable but that’s alright, we’re going to close this out. And so there’s that I’m going to copy this report and go back up top right click and duplicate that tab.
08:56
Now you may also want to consider the information you had in there and March to consider the reversing entries to make sure your reversing entries are there correct. Because there’s two objectives here, you’ll recall, one is to get everything correct as of the cutoff date, February 29. Two is to put everything logistically in a format that it’s okay for the accounting department to push forward and not have our Justin entries messed them up at all. And for that, you can take a look at February. Now also note, when we did some of these adjusting entries, we didn’t do a reversing entry for all of them, because some of them are permanent like, like the insurance prepaid insurance, that’s not a reversing entry thing. But some of them we did reverse.
09:36
So you want to kind of look at those reversing entries and get an idea of which ones are reversing which ones are going to cause a problem for the bookkeeping department. Just imagine, you know, you’re in the bookkeeping department and see the adjusting entry and think well, is this going to mess me up or not? And if it does, then it’s probably one of those cases where you have a reversing entry that could help the situation. So I’m going to run the report then from a one on one 2020 310 to zero, so past the cutoff date. And you could check your numbers for the activity that has happened, you know, up through the 310 in our practice data here as well, I won’t print this one out, but you can just take a look at those. Now, then we’re going to go back and do our journal entry report.
10:19
So now I’m going to open up our hamburger, we’re going to scroll back down to the reports. And this is going to be under the accounting type reports. I’m scrolling back down to 100. So we can see things here. So it’s, it’s going to be down who owes you money, no, all the way down to the accounting stuff, which they put we’re at the bottom. So they stuff for the account and we just put way at the bottom down here. So for my accountant, and I’m going to close up the hamburger. And we’re going to say we want this journal report. This is the journal report we’re looking for going to open up the journal Report. I’m going to go back up top right click and duplicate this tab.
10:56
Then we’ll change the dates up top hole. I’m closing up the hamburger I’m going to Change the dates. And I’m only going to change this to the date of the one day, which is going to be Oh to 29 Tuesday or the day of the cutoff. And before I before I hit Enter on that, just note, what’s down here is the journal. So we have a deposit. And you’re basically going to see the journal activity in terms of the debits and credits related to it. So we have down here, expense. And we have the debit and credit related to the expense.
11:27
This is a really nice worksheet if you if you want to work on your debits and credits and work on what forms mean, and journal entries because you can look at the actual form that’s being created here and say or what’s that doing in terms of a debit and credit, and then open up your balance sheet or profit and loss and see if you understand how that’s been reflected in the balance sheet and profit and loss. So here’s the actual transaction types. Now what we’re looking for are really just the actual journal entries, the journal entries, not any of these forms, we want just the journal entries, the adjusting entries, particularly that we entered as of the end of the time period.

11:59
So this is Going to be Oh, 929, too. So the first thing we’ll do is restrict the date to help us with that. And that’s why we enter when we reason we enter all of our adjusting entries as of the end of the time period, because we want to be able to find them. So then if I run that report, now we see just the information that was entered as of the end of the time period. Now, we still have some checks and whatnot that were entered on the 29th. And that’s a problem what we really want to see here I’d like to narrow this thing down just to the items that are journal entries, and specifically journal entries that are related to and adjusting entry process.
12:37
So here’s the journal entry for payroll, and here’s a journal entry all these ones that say, adjusting entry. Those are the ones that I really want to see. And know those are ones that if your bookkeeping department is separate from the accounting department, like let’s say we did this outside of the QuickBooks system, you need to print these out and give them to the accounting department to put into the system. So we want to be able to isolate These these items. So when one thing we can do next and say, Hey look, I’d like to isolate by the type, which is going to be a journal entry as opposed to any other form. So I’m going to say isolated by date.
13:11
Let’s see if we can customize this thing down to just look at the the journal entry types. So I’m going to go down to the filters, I’m going to look at the transaction type. So within the transaction type, I’m looking for just the journal entry. So now I’m going to check that item. And it should get rid of all the checks and everything else. I’m going to run that report. And then now we just have the journal entries. So that’s getting pretty close. That’s pretty good. Because these are mostly are adjusting journal entries.
13:40
We still have these two this machinery that we bought up here, and the payroll are two journal entry forms that aren’t what we’re looking for. But this is pretty close. What I’m going to do now is I’m going to I’m going to print these things out and I’m actually going to export them to excel. I’m going to export these items to excel and then in Excel, I could clean it even further by just basically deleting these top two journal entries, otherwise I could just print the PDF send it out and say hey, ignore the thought the top two journal entries there. So if these are the journal entries that you want to check if you had a problem with with the trial balance, not timeout, check the adjusting journal entries.
14:19
These are the new things since the last section. So we had an adjusting journal entry related to the note adjusting journal entry related to the other note related to the interest payable. And then this was related to the invoice that we had that we had to bring back into the current time period I believe, prepaid insurance we had to deal with and then depreciation and unearned accounts receivable or unearned revenue and accounts receivable. Let’s go ahead and print this out. So I’m going to go up top and I’m just going to export this one. Let’s just export this one and we’ll clean it up.
14:52
We’ll export it to excel opening up then. So with that report in it, here it is. I’m going to go ahead and copy this whole thing I’m going to go up to the triangle up top, right click and copy the entire thing. minimize this, I’m going to make a new tab in the Report tab, we want balance sheet, p&l trial balance plus, little plus button, double click on the name, this is going to be the journal for ad entries, something like that. And then I’m going to paste that in a one right clicking a one and pasting it in a one. Let’s see if it fits on one page by going to the Page Layout View over here and say, does that fit on one page? It does not.
15:31
Let’s go up top and go to the page layout function and see if we can just change the orientation which is in the page setup and see if that takes care of it. I’m going to go to the landscape as opposed to portrait. And that does indeed take care of it. So that looks good. I can also clean this thing up. For example, I could say I don’t need these top two journal entries. I don’t want those those. I don’t want to include those. So I’m just going to hold down on line six, drag on down to line. What is that 13 and then right click on that selected area. delete those lines. And now we just have our adjusting journal entries. And we can give that and provide that to somebody who would want to see them. And of course, there’s there will be will be in great demand because it’s an excellent report.
16:12
Next, we’re going to say one day up, and we want to take a look at the reversing entry. So I’m going to go to the same report, we’re going to go to the next day, which is going to be March 1, and look at the reversing entries. So now this one should be pretty clean because we haven’t entered any data. In really March we had like a couple things, but not many. So these are all the reversing journal entries. So notice the ones we reversed there should there’s gonna be less of them than the adjusting entries. Because we didn’t reverse like all of the adjusting entries, only the ones that needed reversing. So we had the notes payable to put them back in their proper accounts.
16:44
We had the interest payable that we reversed that invoice that we had to put into the prior period and then reverse it in back in the other periods that wasn’t in there twice as of March. And then we had this item for the accounts receivable which we like to use the negative receipts From a logistical standpoint, okay, let’s go ahead and export this, then I’m going to go back up top, we’re going to export this to excel, then we’ll open up Excel with that report in it. Then I’m going to select the triangle up top and copy that entire report, I’m just going to copy the whole thing. And then we’re going to go back to our other tab we’re going to make this is where all our reports are. And I’m going to make another report down here, double click on the name, and this is going to be the journal for the reversing entries.
17:29
Going to be up in a one, we’re going to right click in a one and paste that into a one. Let’s see if this page fits on one page, we’re probably gonna have to make it landscape because that’s what we had did the last one, which were journal entries. So it doesn’t quite fit. It’s pretty close that one we could probably make that fit. I could like delete the name column because there’s nothing in it. But I’m going to go to landscape because we did that with the other report and it’ll match it if we do that anyway. So I’m going to go to the page layout. We’re going to go to the page setup. We’re going to go to the orientation, changing it forum from the portrait to the landscape. game like so. Now let’s go ahead and print this entire thing out, we’re going to print it to a PDF file.

18:06
So it’ll be on all on one PDF file, which is quite impressive, we’re going to go to the File tab on the far left to do so, we’re going to go down to the printing options, we once again, we’ll be using that cute PDF printer, because that’s a very useful tool for us to use. We’re then going to select the drop down and we’re not printing the active sheet but the entire workbook. So the entire workbook which has nine pages in it now. And if I scroll down, this is what is included in it. And it looks like everything we don’t have, I’m just kind of checking it.
18:37
I don’t have to tape anything together to make it fit. I should have done some format in here and get you know, did the negative number thing and got rid of the footer and whatnot. But I’m not going to deal with that now. So then we’re going to go ahead and print this out. Let’s print it out. And it’s going to ask us, where do we want to put it? It’s going to tell us, that’s where I have it. Is that okay? Because it’s in that full We’re going to say and it’s called financial statements. And we’re going to say, Yep, you got it. That’s where it should go. And then let’s see what we have.
19:07
Now if we go into the adjusting journal entries, we could give this to somebody, I could give them attachments of the balance sheet, the financial statements, and the income statement and the trial bounce Not this one, but because this is all of them. And I didn’t give the journal The Journal reports because I wanted to adjust those in Excel.

19:25
But just doing our normal routine, I could zip this all up into one folder called something like financial statements. And then I can put all these into it, the balance sheet, the income statement, the trial balance, and then if I want to attach it all at one time, of course, I could right click on this tab and go to the Send to and zip it so that we can attach this entire thing to one email file or we can send this PDF file which of course has all the reports in it which is probably Once again, the most impressive kind of way to do it because again, people won’t really know how you did it. They’ll think that you have the PDF, you know, manipulator software of some kind of Adobe, Adobe something. And then so that has all the reports in it. You could always go down and refine it more with with the formatting but that’s going to be the basic technique of it.